All you need to know about Carpenter's Square - 30
Submitted by macelee on 2013-02-18 10:52; Last upda
ted on: 2013-02-21 13:50
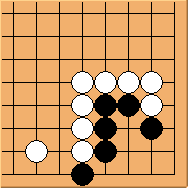
Diagram 30.1: White to play
This is one of the simplest problems in the series if white knows where to start.
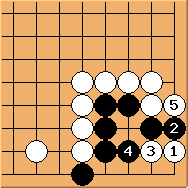
Diagram 30.2: Solution
 is a famous tesuji, simple and effective.
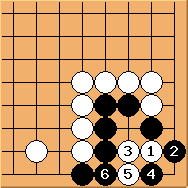
Diagram 30.3: White fails
is incorrect in this shape. A ko is inevitable.
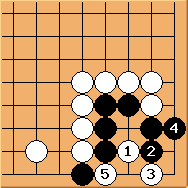
Diagram 30.4: White fails
doesn't work either.  is important. The result is again a ko.
Conclusion: Remember the tesuji in Diagram 30.2 and it can be used in other situations too.
