All you need to know about Carpenter's Square - 22
Submitted by macelee on 2013-02-07 06:43; Last upda
ted on: 2018-11-17 17:25
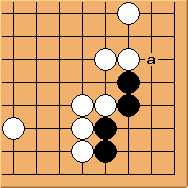
Diagram 22.1: White to play
We already learned that attacking at 'a' from outside is not working. What else?
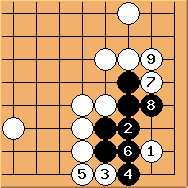
Diagram 22.2: Solution
 is urgent. If
  connects, after forcing moves
  and
and  ,
,  simply reduces the eyespace to kill.
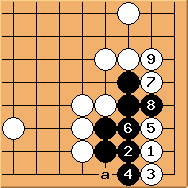
Diagram 22.3: Variation
If , is a good move. White again can kill straight-forwardly.  at 'a' is useless too.
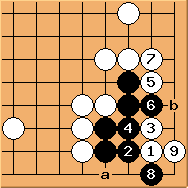
Diagram 22.4: Variation
is an alternative way to kill. After  , 'a' and 'b' are miai points.
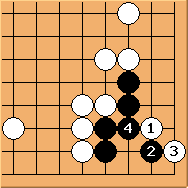
Diagram 22.5: White fails
gives away the key point to black. There is no way to kill this corner any more.
Conclusion: This shape is quite simple. As long as white gets the key 2-2 point, black has no chance.
