All you need to know about Carpenter's Square - 29
Submitted by macelee on 2013-02-16 15:38; Last upda
ted on: 2013-02-18 10:58

Diagram 29.1: White to play
We've seen very similar patterns while studying Shape 23 and 24. Just to repeat here to make the series complete.
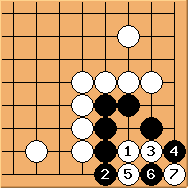
Diagram 29.2: Solution
 is clearly the only move.
  is the best answer.
  is also the only correct move. The result is a ko.
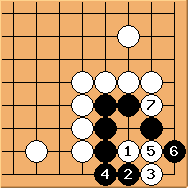
Diagram 29.3: Black fails
is a poor answer. It's never a good idea to reduce your own eyespace. The corner is dead.

Diagram 29.4: Black fails
 is useless.
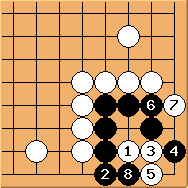
Diagram 29.5: White fails
here is incorrect. is good. The corner would end up in seki.
Conclusion: Diagram 29.2 is the best sequence for both sides.
