All you need to know about Carpenter's Square - 31
Submitted by macelee on 2013-02-21 13:38; Last upda
ted on: 2018-11-17 17:35
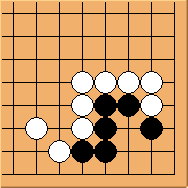
This shape is very similar to Shape 30.
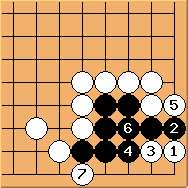
The solution is similar too.  is still the key point and black corner suffers the same fate as in Shape 30.
 does not work either. White has longer liberty. Note that white cannot play
  though.
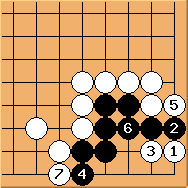
 is incorrect.
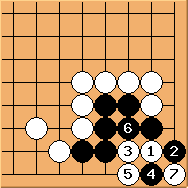
  is important to form a ko. If black connects at
  first, allowing white to occupy
  , the corner would be dead.
To summarise: this is another simple problem. The tesuji  in Diagram 31.2 should be memorised.


